Introduction
In today’s competitive digital landscape, having a well-crafted portfolio website is crucial for showcasing your work and making a lasting impression on potential clients or employers. Whether you’re a designer, developer, photographer, or any other creative professional, a strong online presence can significantly boost your visibility and opportunities. Webflow is a powerful platform that allows you to create stunning, fully responsive portfolio websites without needing to write a single line of code.
This comprehensive guide will walk you through every step of creating a professional portfolio website in Webflow, from initial planning and setup to design and final launch. By following these steps, you’ll be able to build a portfolio that effectively communicates your skills and accomplishments while standing out in a crowded digital space.
Planning Your Portfolio Website
Before you dive into Webflow reviews, it’s essential to spend some time planning your portfolio website. This planning phase will help you define your goals, understand your audience, and decide on the content and design elements that will best showcase your work.
Define Your Goals
The first step in planning your portfolio website is to clearly outline what you hope to achieve with it. Ask yourself the following questions:
- What is the primary purpose of my portfolio website? Are you looking to attract new clients, secure a job, or simply showcase your work?
- What specific goals do I want to accomplish? For example, do you want to generate leads, showcase your expertise, or create a platform for networking?
Your goals will influence every aspect of your site’s design and functionality, so take the time to think them through carefully.
Identify Your Target Audience
Understanding your target audience is crucial for tailoring your content and design to meet their expectations. Consider the following:
- Who will be visiting my portfolio website? Potential clients, employers, industry peers, or a combination of these.
- What are their needs and expectations? Are they looking for a specific type of work, detailed case studies, or a quick overview of your skills?
By identifying your target audience, you can make informed decisions about the content and features of your site, ensuring it resonates with those who matter most.
Plan Your Content
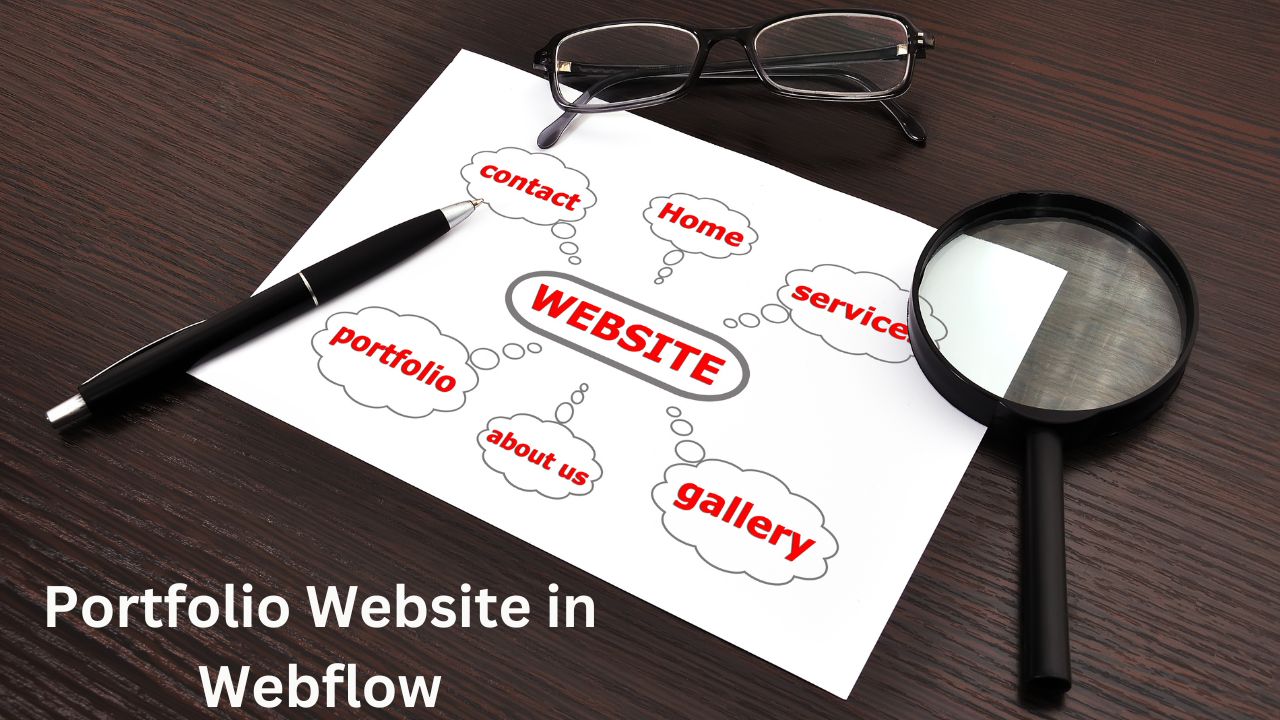
The content of your portfolio website is key to effectively showcasing your work and achievements. Typically, your site will include the following sections:
- Homepage: This is your chance to make a strong first impression. Include a compelling introduction to who you are and what you do.
- Portfolio Gallery: Showcase your best work with detailed descriptions and high-quality images. Organize your projects in a way that highlights your skills and expertise.
- About Page: Provide information about your background, skills, and experience. This helps visitors understand who you are and what you bring to the table.
- Contact Page: Make it easy for visitors to get in touch with you. Include an email address, a contact form, and any other important contact details.
- Blog (Optional): Share insights, updates, and industry-related articles to engage with your audience and demonstrate your thought leadership.
Sketch Out the Layout
Creating a rough sketch or wireframe of your site’s layout will help you visualize how different elements will be arranged and how users will navigate through your site. Consider the following components:
- Header: Where your logo, navigation menu, and possibly a call-to-action (CTA) button will be placed.
- Hero Section: A prominent area on the homepage designed to grab attention, often featuring a large image or video and a strong message.
- Content Sections: Areas dedicated to showcasing your portfolio, providing information about you, and presenting blog posts.
- Footer: Typically includes additional navigation links, contact information, and social media icons.
Choose a Design Style
Your portfolio’s design style should align with your brand and the message you want to convey. Consider the following design elements:
- Colors: Choose a color scheme that reflects your personality and profession.
- Typography: Choose accessible fonts that match well with your design.
- Overall Aesthetics: Decide on a visual style that aligns with your work and industry.
Webflow offers a range of customizable templates that can help you get started, but having a clear design vision will guide your choices and ensure a cohesive look.
Setting Up Your Webflow Account
With your planning in place, it’s time to set up your Webflow account and familiarize yourself with the platform. This step is essential for getting started with designing and building your portfolio website.
Create a Webflow Account
To begin, you’ll need to create a Webflow account. Follow these steps:
- Sign Up: Visit Webflow’s website and click on the “Sign Up” button. In addition to using your Google account or email address, there are also alternative ways to sign up.
- Choose a Plan: Webflow offers various plans, including a free tier with basic features. For more advanced capabilities and custom domain support, consider opting for one of their paid plans. Review the plans and choose the one that fits your needs.
Explore the Webflow Dashboard
Once you’re logged in, take some time to explore the Webflow dashboard. Familiarize yourself with the main areas:
- Projects: This section displays all your existing projects and allows you to create new ones.
- Templates: Browse through Webflow’s template library for inspiration or to start with a pre-designed template.
- Account Settings: Manage your profile, billing information, and other account-related settings.
Create a New Project
To start building your portfolio, you’ll need to create a new project:
- Start a New Project: Click the “New Project” button on your dashboard. You can choose to start with a blank canvas or use a template.
Name Your Project: Give your project a meaningful name that reflects your portfolio. This will help you keep track of your work and make it easier to manage.
Creating the Site Structure
With your Webflow account set up and your project created, it’s time to establish the basic structure of your site. This involves creating and organizing pages to ensure a logical flow and easy navigation.
Set Up Your Site Structure
Start by building the site’s fundamental structure:
- Add Pages: Navigate to the Pages panel and add the necessary pages for your site, such as Homepage, Portfolio, About, and Contact.
- Set Up Navigation: Create a navigation menu to help users easily access different sections of your site. This is typically done through the Header section.
Customize Your Project Settings
Next, configure your project settings to ensure everything is aligned with your branding and optimization goals:
- Site Settings: Configure your site’s settings, including the site title, favicon, and SEO metadata. This helps with search engine optimization and overall branding.
Add a Custom Domain (Optional): If you have a custom domain, connect it to your Webflow project. This step may require configuring DNS settings through your domain registrar.
Designing Your Portfolio Website
Now that your site structure is in place, it’s time to focus on design. This is where you’ll bring your vision to life, creating a unique and visually appealing portfolio that effectively showcases your work.
Choose a Template or Start from Scratch
Webflow offers flexibility in how you design your site. You can either use a template or start from scratch, depending on your preferences and needs.
- Select a Template: Browse Webflow’s extensive template library to find one that aligns with your style and needs. Templates provide a pre-designed layout that you can customize to fit your content. This can be a great way to speed up the design process, especially if you find a template that closely matches your vision.
- Start from Scratch: If you prefer a more personalized approach, begin with a blank canvas. This option allows you to build your design from the ground up, giving you complete control over every element of your site. Starting from scratch can be ideal if you have a specific design in mind or want to create a highly customized portfolio.
Design Your Homepage
The homepage is often the first impression visitors will have of your portfolio, so it’s essential to make it engaging and informative. Here’s how to design an effective homepage:
- Create a Hero Section: Design a striking hero section to grab visitors’ attention immediately. This area typically includes a large, high-quality image or video, a clear headline, and a call-to-action (CTA) button. The hero section should convey who you are and what you do compellingly.
- Add a Portfolio Overview: Include a section on your homepage that highlights a few of your best projects. This can be in the form of a gallery, slideshow, or grid layout. The goal is to give visitors a quick glimpse of your work and entice them to explore further.
- Include a Brief Introduction: Provide a short introduction about yourself, including your name, profession, and a summary of your skills or expertise. This makes your identity and services easier for visitors to understand.
Design the Portfolio Page
The portfolio page is the heart of your site, where you’ll showcase your work in detail. Here’s how to design an effective portfolio page:
- Create a Gallery or Grid Layout: Use Webflow’s design tools to create a gallery or grid layout to display your projects. Each project should have its own space, featuring an image or video, a title, and a brief description. This layout makes it easy for visitors to browse through your work.
- Add Project Details: For each project, include detailed information such as the project goals, your role, and the technologies or skills used. Providing context helps potential clients or employers understand the significance of each project and your contribution.
- Include Filters or Categories: If you have a diverse range of projects, consider adding filters or categories to help users find specific types of work. For example, you might have filters for web design, graphic design, and photography.
Design the About Page
The About page is your opportunity to provide more information about yourself and your background. This page should build credibility and help visitors connect with you. Here’s how to design an effective About page:
- Write a Compelling Bio: Craft a bio that highlights your background, skills, and experience. Include details such as your education, work experience, and any notable achievements or awards. A well-written bio can make a strong impression and set you apart from others.
- Add a Professional Photo: Include a high-quality, professional photo of yourself. This helps create a personal connection with visitors and reinforces your professional image.
- Include Testimonials (Optional): If you have received positive feedback from clients or colleagues, consider adding testimonials to build credibility. Testimonials provide social proof and can help potential clients or employers feel more confident in your abilities.
Design the Contact Page
The Contact page is where potential clients or employers can reach out to you. It’s important to make this page as user-friendly as possible. Here’s how to design an effective Contact page:
- Add a Contact Form: Include a contact form that allows visitors to send you a message directly from your site. Webflow’s form builder makes it easy to create and customize forms. Ensure the form is simple and easy to use, with fields for essential information like name, email, and message.
- Include Contact Information: Provide alternative ways for visitors to contact you, such as your email address, phone number, or links to your social media profiles. This gives visitors multiple options for getting in touch and can increase the chances of receiving inquiries.
Add a Map (Optional): If you have a physical office or studio, consider adding a map to help visitors find you. This can be particularly useful for local clients or employers who may want to visit in person.
Implementing Animations and Interactions
Adding animations and interactions can enhance the user experience and make your site stand out. Webflow offers powerful tools for creating dynamic effects that engage visitors. Here’s how to implement animations and interactions effectively:
Add Page Load Animations
Create animations that trigger when the page loads to add a dynamic feel to your site. These animations can include fading in elements, moving objects into place, or creating other visual effects that capture visitors’ attention.
- Fade-In Effects: Use fade-in effects to gradually reveal content as the page loads. This can create a smooth and visually appealing introduction to your site.
- Slide-In Effects: Implement slide-in animations to bring elements into view from the sides of the screen. This can add a sense of movement and depth to your design.
Incorporate Scroll Animations
Scroll-based animations can bring your site to life as users navigate through the page. These animations can include text or image effects that occur as the user scrolls down the page.
- Reveal Animations: Use reveal animations to gradually display content as the user scrolls. This can give your website a more dynamic, captivating feel.
- Parallax Effects: Implement parallax scrolling effects to create a sense of depth and movement. This technique involves different layers of content moving at different speeds as the user scrolls.
Set Up Hover Effects
Hover effects give consumers visual feedback when they interact with buttons, links, or images. These effects can enhance the user experience by making your site feel more responsive and interactive.
- Button Effects: Add hover effects to buttons, such as color changes or shadow effects, to make them stand out and encourage clicks.
Image Effects: Implement hover effects on images, such as zooming or overlay text, to create a more engaging visual experience.
Integrating Responsive Design
Ensuring your portfolio looks great on all devices is crucial for providing a seamless user experience. Webflow’s responsive design tools allow you to adjust your site’s layout and design for different screen sizes. Here’s how to integrate responsive design effectively:
Use Breakpoints
Webflow allows you to set up different breakpoints for various devices, such as desktop, tablet, and mobile. This lets you control how your site appears on different screen sizes.
- Desktop Breakpoint: Design your site for larger screens, focusing on layout and content organization.
- Tablet Breakpoint: Adjust your design for tablet screens, ensuring that content remains accessible and visually appealing.
- Mobile Breakpoint: Optimize your design for mobile devices, prioritizing ease of use and readability on smaller screens.
Adjust Layouts
Customize the layout of your content for smaller screens to ensure a seamless experience across all devices. This may involve stacking elements vertically, adjusting sizes, or simplifying the design.
- Vertical Stacking: Stack elements vertically on smaller screens to make better use of limited space.
- Responsive Sizing: Adjust the size of images and text to ensure they are readable and visually appealing on smaller devices.
Test Responsiveness
Regularly preview your site in different screen sizes and devices to ensure everything is displaying correctly and functioning as intended. This helps identify and fix any issues before your site goes live.
- Browser Testing: Test your site in major browsers such as Chrome, Firefox, Safari, and Edge to ensure compatibility.
Device Testing: Preview your site on various devices, including smartphones and tablets, to check for responsiveness and usability.
Setting Up Forms and CTAs
Forms and calls-to-action (CTAs) are essential for capturing leads and encouraging user engagement. Here’s how to set up forms and CTAs effectively:
Design Forms
Create forms for contact, newsletter sign-ups, or other purposes. Webflow’s form elements allow you to customize fields, labels, and buttons to fit your design.
- Contact Forms: Design contact forms with fields for name, email, and message. Ensure the form is easy to use and visually aligned with your site’s design.
- Newsletter Forms: If you’re collecting email addresses for a newsletter, include fields for name and email, and add a clear CTA to encourage sign-ups.
Configure Form Notifications
Set up email notifications to receive form entries straight to your inbox. You can also integrate forms with tools like Zapier for additional functionality, such as automating follow-up emails or connecting with CRM systems.
- Email Notifications: Configure email notifications to alert you when a form is submitted. This ensures you respond promptly to inquiries.
- Integration: Use integration tools to connect your forms with other applications, such as email marketing platforms or customer relationship management (CRM) systems.
Add Effective CTAs
Place clear and compelling CTAs throughout your site to drive user interaction. Use action-oriented language and ensure buttons are easily noticeable.
- Action-Oriented Language: Use phrases like “Contact Me,” “Get a Quote,” or “View My Work” to encourage users to take action.
Button Design: Ensure CTA buttons are visually distinct and easy to find. Use contrasting colors and clear labels to make them stand out.
Testing and Reviewing
Before launching your portfolio website, it’s crucial to thoroughly test and review every aspect of your site. This ensures everything is functioning correctly and provides a seamless user experience.
Conduct Usability Testing
Ask friends, family, or colleagues to test your site and provide feedback on its usability. They can offer insights into potential issues or areas for improvement.
- Test Navigation: Ensure that all navigation links and buttons work correctly and lead to the intended pages.
- Check Content: Review the content for accuracy, readability, and consistency. Make sure all text and images are displaying properly.
Review Performance
Check your site’s performance to ensure it loads quickly and efficiently. Use Webflow’s built-in performance tools to identify and address any issues.
- Page Speed: Test your site’s loading speed and optimize images, scripts, and other elements to improve performance.
- Mobile Performance: Ensure that your site performs well on mobile devices, with fast loading times and smooth interactions.
Proofread Content
Carefully proofread all content on your site to catch any spelling, grammar, or formatting errors. Insightful content boosts your professional and credible image.
- Check for Errors: Look for any typos or grammatical mistakes and correct them.
Consistent Formatting: Ensure consistent formatting across all pages, including font styles, colors, and spacing.
Launching Your Portfolio Website
With testing complete and everything in place, you’re ready to launch your portfolio website. This final step involves making your site live and ensuring it’s accessible to your target audience.
Publish Your Site
In Webflow, publishing your site is a straightforward process. Follow these steps:
- Preview Your Site: Use the preview feature to review your site one last time and ensure everything looks and functions as expected.
- Publish to Webflow: Click the “Publish” button to make your site live on the Webflow subdomain (e.g., yourportfolio.webflow.io).
- Connect Your Custom Domain: If you have a custom domain, follow Webflow’s instructions to connect it. This involves logging into your domain registrar and configuring DNS settings.
Promote Your Portfolio
Once your site is live, promote it to reach your target audience. Use various channels to drive traffic and increase visibility:
- Social media: Post links to your portfolio on Twitter, Instagram, LinkedIn, and other social media platforms.Engage with your network and encourage them to visit your site.
- Professional Networks: Join industry forums, groups, and online communities where you can share your portfolio and connect with potential clients or employers.
- Email Outreach: Send a personalized email to potential clients, collaborators, or employers, including a link to your portfolio and a brief introduction.
Monitor and Update
After launching your site, regularly monitor its performance and make updates as needed. Keep your portfolio up-to-date with your latest work and achievements to ensure it continues to reflect your skills and expertise.
- Track Analytics: Use Webflow’s built-in analytics or integrate with Google Analytics to track visitor behavior and site performance.
Update Content: Regularly update your portfolio with new projects, blog posts, or other relevant content to keep your site fresh and engaging.
SEO Optimization for Your Portfolio Website
Search Engine Optimization (SEO) is crucial for ensuring your portfolio website ranks well in search engine results and is discoverable by potential clients or employers. Here’s how to improve the SEO of your Webflow website:
Configure Basic SEO Settings
Webflow provides several tools to help you optimize your site for search engines. Start by configuring basic SEO settings:
- Site Title and Meta Description: Set a descriptive and keyword-rich title and meta description for your site. This information appears in search engine results and can influence click-through rates. Navigate to the SEO settings in Webflow and enter a concise, compelling title and description that reflect your portfolio and expertise.
- Favicon: Upload a favicon (a small icon that appears in the browser tab) to enhance your site’s branding and make it easily recognizable in browser tabs and bookmarks.
Optimize Page Content
Ensure each page on your site is optimized for relevant keywords and provides valuable content. This involves:
- Keyword Research: Identify relevant keywords related to your field and incorporate them naturally into your page content, headings, and meta tags. Tools such as Google Keyword Planner and SEMrush can assist with keyword research.
- Header Tags: Use header tags (H1, H2, H3, etc.) to structure and improve the readability of your text. Header tags also help search engines understand the hierarchy and relevance of your content.
- Alt Text for Images: Add descriptive alt text to all images on your site. Alt text makes your photos more accessible to visually impaired users and helps search engines interpret their content.
Enhance Mobile SEO
With the increasing use of mobile devices, optimizing your site for mobile search is essential. Webflow’s responsive design tools help ensure your site looks great on all devices, but consider additional mobile SEO factors:
- Mobile-Friendly Design: Ensure your site’s design is optimized for mobile users. This includes easy navigation, legible text, and appropriately sized buttons and links.
- Page Speed: Mobile users often have slower internet connections, so it’s important to optimize page load times. Compress images, minimize scripts, and use Webflow’s performance tools to improve loading speeds.
Build Backlinks
Backlinks (links from other websites to your site) can improve your site’s authority and search engine ranking. Here’s how to build backlinks:
- Guest Blogging: Write guest posts for industry-related blogs or websites and include a link back to your portfolio. This can drive traffic and enhance your site’s credibility.
- Networking: Connect with industry professionals and ask if they would be willing to link to your portfolio from their site or blog.
Submit to Directories: List your portfolio in relevant online directories or portfolio sites to gain additional exposure and backlinks.
Analyzing and Improving Your Portfolio Site
After launching your portfolio website, it’s important to continuously analyze its performance and make improvements based on user feedback and analytics data.
Use Analytics Tools
Implement analytics tools to track visitor behavior, site performance, and other key metrics. Webflow integrates with Google Analytics, which provides detailed insights into your site’s traffic and user interactions.
- Track Metrics: Monitor metrics such as page views, bounce rates, average session duration, and conversion rates. These metrics can help you understand how users are interacting with your site.
- Identify Trends: Analyze data to identify trends and patterns in user behavior. For example, you might find that users spend more time on certain pages or that specific content drives more engagement.
Gather User Feedback
Solicit feedback from users to identify areas for improvement. This can be accomplished by surveys, user testing, or direct communication.
- Surveys: Create and distribute surveys to gather feedback on your site’s usability, design, and content. This can provide valuable insights into how users perceive and interact with your site.
- User Testing: Conduct usability testing with real users to observe how they navigate your site and identify any issues or challenges they encounter.
Make Data-Driven Improvements
Use the insights from your analytics and user feedback to make data-driven improvements to your site. This might involve:
- Adjusting Content: Update or expand content based on user interests and behavior. For example, if a particular project or blog post is popular, consider creating more content on similar topics.
- Refining Design: Make design adjustments to improve usability and visual appeal. This could include changes to layout, color schemes, or typography based on user feedback and performance data.
Optimizing Performance: Address any performance issues identified through analytics. This might involve optimizing images, improving page load times, or fixing broken links.
Keeping Your Portfolio Updated
A portfolio website is not a static entity; it should evolve as your career progresses and your body of work grows. Here’s how to keep your portfolio up-to-date and relevant:
Add New Projects
Regularly update your portfolio with new projects to showcase your latest work and achievements. This demonstrates that you are active in your field and provides potential clients or employers with the most current examples of your skills.
- Highlight Recent Work: Add new projects to your portfolio and ensure they are prominently featured. Update descriptions, images, and any relevant details to accurately represent each project.
- Remove Outdated Work: Periodically review your portfolio and remove older projects that no longer reflect your current skills or style. Focus on showcasing work that aligns with your current goals and expertise.
Update Content and Design
Refresh your content and design to reflect changes in your professional journey and personal brand. This might include updating your bio, adding new testimonials, or redesigning elements of your site.
- Revise Your Bio: Update your bio to include new skills, experiences, or accomplishments. This keeps your profile current and relevant to potential clients or employers.
- Redesign Sections: Periodically review and redesign sections of your site to ensure they remain visually appealing and aligned with your brand.
Monitor Industry Trends
Stay informed about industry trends and incorporate relevant updates into your portfolio. This helps ensure your site remains modern and competitive.
- Follow Trends: Keep up with design trends, technology advancements, and industry news. Apply relevant trends to your portfolio to maintain a fresh and contemporary look.
Adapt to Changes: Be prepared to adapt your portfolio to changes in your industry or career focus. This might involve highlighting new types of work or updating your site’s functionality.
Conclusion
Creating a standout portfolio website in Webflow involves several key stages, from planning and design to development and interactivity. By thoroughly understanding your audience and defining clear goals, you set a solid foundation for your portfolio. Crafting a visually appealing and user-friendly design allows you to showcase your work effectively, while integrating interactive elements can enhance engagement and demonstrate your skills in action.
In summary, a well-executed portfolio site is more than just a collection of work; it’s a dynamic representation of your professional identity. By focusing on detailed design, functionality, and user experience, you create a powerful tool for attracting clients or employers and advancing your career. Remember, your portfolio is a reflection of your unique abilities and creativity—invest the time and effort needed to make it truly exceptional.